Categories

This manual provides essential guidance for Coleman pool owners‚ covering setup‚ maintenance‚ safety‚ and troubleshooting. It ensures a refreshing and secure swimming experience throughout the season.
Coleman Pools offer an accessible and enjoyable way to beat the heat‚ providing families with a fantastic backyard oasis. Known for their durability and relatively easy setup‚ Coleman pools range in size and style to suit various needs and spaces. This manual serves as your comprehensive resource‚ guiding you through every stage of pool ownership – from initial unboxing and installation to ongoing maintenance and safe operation.
Whether you’ve chosen a Power Steel‚ Fast Set‚ or another Coleman model‚ understanding the specific features of your pool is crucial. Proper installation‚ adhering to safety guidelines‚ and consistent water maintenance are key to maximizing enjoyment and ensuring a long lifespan for your investment. This guide will help you navigate the process‚ offering clear instructions and helpful tips. Remember to always follow the manufacturer’s specific instructions included with your pool.
Coleman offers diverse pool models‚ each with unique characteristics. Before beginning setup‚ carefully identify your specific pool – Power Steel‚ Fast Set‚ or another variant – as instructions vary. Locate the model number and refer to the accompanying documentation‚ or scan the QR code on the front cover for digital access to detailed guides. Drawings are for illustrative purposes only and may not perfectly reflect your product.
Familiarize yourself with all components included in the package. Understanding the function of each part – frame‚ liner‚ pump‚ filter‚ ladder – is essential for correct assembly and future maintenance. Note any specific features of your model‚ such as the type of filtration system or ladder design. Assembly is often tool-free‚ but knowing your pool’s specifics streamlines the process and ensures a secure‚ enjoyable swimming experience.
Proper installation is crucial for a safe and enjoyable pool season. Follow these steps carefully: unboxing‚ location selection‚ ground preparation‚ frame assembly‚ and liner installation.
Carefully unpack all components from the Coleman pool packaging‚ ensuring you have ample space to work. Begin by cross-referencing the parts list included in the manual with the actual contents of the box. This meticulous inventory process is vital to identify any missing or damaged parts before you commence assembly.
Pay close attention to smaller items like bolts‚ screws‚ and connectors‚ as these are easily misplaced. Organize the components into logical groups – frame pieces‚ liner‚ pump‚ filter‚ and accessories – to streamline the setup process. If any parts are missing or damaged‚ immediately contact Coleman customer support for replacements. Do not attempt to substitute parts‚ as this could compromise the structural integrity and safety of the pool. Retain the packaging and manual for future reference‚ especially regarding warranty claims or potential repairs. A thorough unboxing and inventory sets the foundation for a smooth and successful pool installation.
Selecting the ideal location for your Coleman pool is crucial for both safety and longevity. Prioritize a completely level surface‚ free from rocks‚ roots‚ or any sharp objects that could puncture the liner. Ensure the chosen spot receives at least six to eight hours of direct sunlight daily to aid in water warming and chemical balance.
Maintain a safe distance from overhead power lines‚ trees with falling branches‚ and any structures that could potentially collapse into the pool area. Consider proximity to a water source and electrical outlet for convenient pump and filter operation. The ground should be capable of supporting the filled pool’s weight; consult the manual for specific weight specifications. Avoid locating the pool on soft or unstable soil. Finally‚ check local regulations and homeowner association rules regarding pool placement and fencing requirements before beginning installation.
Thorough ground preparation is essential for a stable and long-lasting Coleman pool installation. Begin by removing all grass‚ vegetation‚ rocks‚ and debris from the designated area. Excavate the soil to a depth of several inches‚ ensuring a level base. A sand base is highly recommended; spread a 2-3 inch layer of leveling sand across the excavated area‚ compacting it firmly to create a smooth‚ even surface.
Consider using a ground cloth or tarp beneath the sand layer to provide an extra barrier against punctures and root growth. Carefully inspect the prepared area for any remaining sharp objects. A properly prepared ground prevents liner damage‚ ensures structural integrity‚ and contributes to a safer swimming experience. Double-check the levelness using a spirit level before proceeding with pool frame assembly.
Carefully unpack all frame components and verify against the parts list to ensure everything is present. Begin assembling the pool frame by connecting the base rails‚ following the manufacturer’s diagrams precisely. Ensure all connections are secure and properly aligned; most Coleman pools require no additional tools for assembly.
Next‚ attach the upright supports to the base frame‚ ensuring they are evenly spaced and firmly locked into place. Once the uprights are secure‚ connect the top rails‚ completing the circular or rectangular frame structure. Regularly check for stability throughout the assembly process. A correctly assembled frame provides the necessary support for the pool liner and ensures a safe and enjoyable swimming experience. Refer to the included illustrations for visual guidance.
Before installing the liner‚ thoroughly inspect the pool frame for any sharp objects or protrusions that could damage it. Carefully unfold the pool liner and gently lay it inside the assembled frame‚ ensuring it’s centered. Smooth out any wrinkles or creases‚ working from the center outwards to avoid trapping air.

Begin filling the pool with water slowly‚ continuing to smooth the liner as it fills. This helps the liner conform to the shape of the frame and minimizes wrinkles. Avoid stretching the liner excessively during this process. Once the water level reaches a certain point‚ re-check the liner for any remaining wrinkles and adjust as needed. Proper liner installation is crucial for preventing leaks and ensuring the longevity of your Coleman pool.

Coleman pools utilize essential components‚ including filtration‚ pumps‚ and chemical balancing systems‚ to maintain clean and safe water for enjoyable swimming all season long.
The filtration system is the heart of a clean and healthy Coleman pool‚ responsible for removing debris‚ impurities‚ and contaminants from the water. Understanding its components and operation is crucial for maintaining optimal water quality. Typically‚ Coleman pools employ cartridge filter systems‚ known for their efficiency and ease of use.
These systems draw water from the pool through skimmers and the main drain‚ passing it through a filter cartridge that traps particles; Cleaned water is then returned to the pool‚ creating a continuous circulation process. The size and capacity of the filter cartridge are determined by the pool’s volume‚ ensuring adequate filtration. Regular cleaning or replacement of the cartridge is vital for maintaining its effectiveness. A properly functioning filtration system not only enhances water clarity but also reduces the need for excessive chemical treatments‚ contributing to a more enjoyable and cost-effective pool experience.
Proper pump installation is paramount for efficient pool operation and longevity. Begin by positioning the pump on a level surface‚ close to the filter system‚ and protected from direct sunlight and the elements. Ensure all electrical connections adhere to local codes and are performed by a qualified electrician. Before starting the pump‚ prime it by filling the pump housing with water – this prevents damage to the impeller.
Once primed‚ connect the power supply and observe the pump’s operation. It should run smoothly and quietly‚ circulating water through the filter system. Regularly check for leaks around the pump connections and ensure the strainer basket is free of debris. Operating the pump for an appropriate duration each day‚ typically 8-12 hours‚ maintains water circulation and facilitates effective filtration. Always disconnect power before performing any maintenance or inspection.
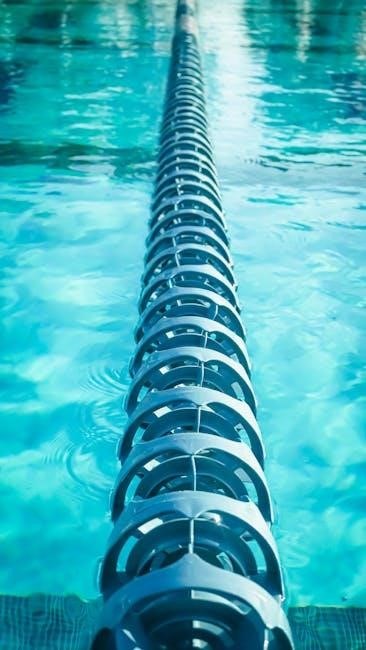
Consistent filter maintenance is crucial for crystal-clear pool water and optimal system performance. Regularly backwash the filter – the frequency depends on pool usage and debris levels‚ typically every 1-3 weeks; Backwashing reverses the water flow‚ flushing out accumulated dirt and grime. After backwashing‚ ensure the filter is properly rinsed to restore normal operation.
Periodically inspect the filter cartridge or sand for wear and tear. Cartridge filters should be cleaned with a filter cleaner solution and replaced annually‚ or as needed. Sand filters require sand replacement every 3-5 years. Maintaining proper water flow through the filter is essential; check for clogs or obstructions. A well-maintained filter significantly reduces the need for chemical treatments and extends the life of your pool system. Always turn off the pump before any filter maintenance.
Maintaining proper water chemistry is paramount for swimmer comfort‚ equipment protection‚ and water clarity. Regularly test the water for pH‚ alkalinity‚ calcium hardness‚ and sanitizer levels (chlorine or bromine). Ideal pH should be between 7.2 and 7.8. Alkalinity impacts pH stability‚ aiming for 80-120 ppm. Calcium hardness prevents corrosion‚ ideally between 200-400 ppm.
Sanitizer eliminates bacteria and algae. Chlorine levels should be 1-3 ppm‚ while bromine should be 3-5 ppm. Shock the pool weekly‚ or after heavy use‚ to oxidize contaminants. Use algaecide as a preventative measure. Consistent chemical balance prevents scaling‚ corrosion‚ and cloudy water. Always follow product instructions carefully and add chemicals slowly‚ dispersing them evenly throughout the pool. Store chemicals in a cool‚ dry‚ and well-ventilated area.
Regular water testing is crucial for a safe and enjoyable swimming experience. Utilize a reliable test kit or strips to analyze your Coleman pool water at least twice weekly‚ and more frequently during periods of heavy use or after rainfall. Key parameters to assess include pH‚ total alkalinity‚ calcium hardness‚ and sanitizer levels (chlorine or bromine).
Accurate testing ensures proper chemical balance. pH should ideally range between 7.2 and 7.8. Total alkalinity‚ acting as a pH stabilizer‚ should be maintained between 80-120 ppm. Calcium hardness‚ preventing corrosion‚ is best between 200-400 ppm. Sanitizer levels – 1-3 ppm for chlorine‚ 3-5 ppm for bromine – are vital for eliminating bacteria. Record your results to track trends and adjust chemicals accordingly for optimal water quality.
Maintaining balanced water requires careful adjustment of chemical levels based on your test results. If pH is too low‚ add soda ash (alkalinity increaser). For high pH‚ use muriatic acid or dry acid‚ following product instructions precisely. Adjust alkalinity before pH‚ as it stabilizes the pH level. Low calcium hardness necessitates calcium chloride addition‚ while high levels are difficult to reduce without partial water draining.
Sanitizer levels are adjusted with chlorine or bromine products. Shock the pool weekly‚ or after heavy use‚ to oxidize contaminants. Always pre-dissolve chemicals in a bucket of water before adding them to the pool‚ and never mix different chemicals together. Allow sufficient circulation time after adding chemicals before retesting the water. Prioritize safety and follow all product label guidelines.

Prioritize safety with proper ladder installation and deck maintenance. Constant supervision and adherence to safe pool practices are crucial for preventing accidents and ensuring enjoyment.
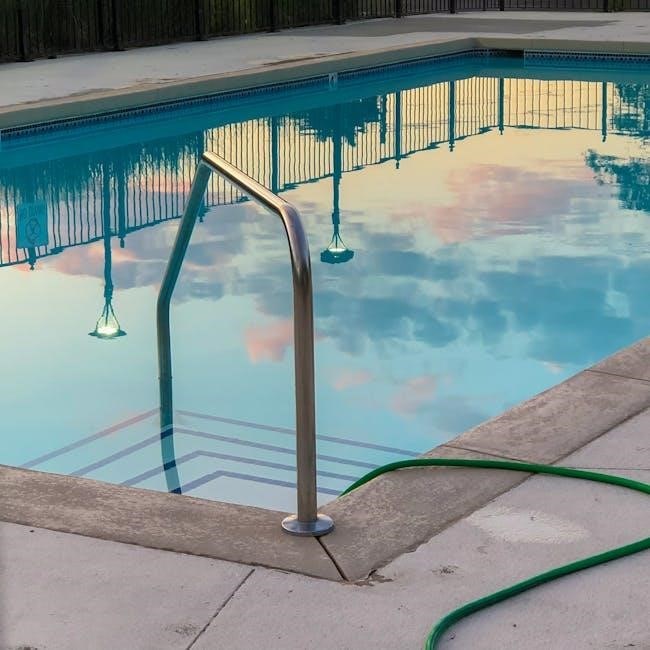
Secure entry and exit are paramount for pool safety. Always install a pool ladder or staircase following the manufacturer’s instructions meticulously. Ensure the ladder’s steps or stairs are firmly anchored to the pool frame and the deck‚ providing stable footing. Regularly inspect the ladder for any signs of wear‚ corrosion‚ or loose bolts – promptly address any issues discovered.
The deck surrounding the pool should be kept clean and free of obstructions to prevent tripping hazards. Educate all pool users‚ especially children‚ on the correct and safe way to use the ladder or staircase. Emphasize the importance of facing the ladder while climbing and avoiding running or horseplay near the entry/exit points. Consider adding handrails for enhanced stability‚ particularly for those with mobility challenges. A properly installed and maintained ladder significantly contributes to a safer pool environment.
Maintaining a safe and secure pool deck is crucial for preventing accidents. Regularly inspect the deck surface for cracks‚ splinters‚ or uneven areas‚ addressing any damage promptly to avoid trips and falls. Keep the deck clean and dry‚ removing algae‚ leaves‚ and other debris that can create slippery conditions. Ensure adequate lighting around the pool area‚ especially for evening use‚ to enhance visibility.
Check frequently for loose bolts or structural weaknesses in the deck’s construction. Clear the deck of any objects that could pose a tripping hazard‚ such as toys‚ furniture‚ or gardening tools. Consider applying a non-slip coating to the deck surface for added traction. Educate pool users about safe deck practices‚ including walking cautiously and avoiding running. A well-maintained deck contributes significantly to overall pool safety and enjoyment.
Constant and vigilant supervision is paramount when a pool is in use‚ especially with children or non-swimmers. Designate a responsible adult as the “water watcher‚” solely focused on monitoring the pool area. Never leave children unattended near the pool‚ even for a moment. Establish clear pool rules and ensure all users understand and adhere to them‚ including no running‚ diving in shallow areas‚ and appropriate behavior.
Encourage swim lessons for all family members to improve water safety skills. Familiarize yourself with CPR and basic water rescue techniques. Keep rescue equipment‚ such as a life ring or reaching pole‚ readily accessible. Avoid alcohol consumption while supervising the pool. Promote responsible pool practices to create a safe and enjoyable environment for everyone. Remember‚ proactive supervision is the most effective safety measure.

This section addresses frequent problems like leaks‚ pump malfunctions‚ and liner care‚ offering practical solutions to quickly restore your Coleman pool to optimal condition.
Identifying the source of a leak is crucial for efficient repair. Begin by visually inspecting the pool liner‚ seams‚ and around fittings like the skimmer and return jets. A common method involves using a dye test – introduce a small amount of pool dye near suspected areas and observe if it’s drawn towards a leak.
For minor liner punctures‚ a specialized underwater patch kit is often sufficient. Ensure the area is thoroughly cleaned and dried before applying the patch‚ following the kit’s instructions carefully. Larger tears may require a professional repair or liner replacement.
Check all connections for tightness‚ including the pump‚ filter‚ and plumbing lines. If a leak is found at a fitting‚ tighten the connection or replace the O-ring or gasket. Regularly inspect the pool structure for any signs of damage or corrosion that could contribute to leaks. Prompt attention to leaks prevents water loss and potential structural issues.
Addressing pump and filter issues promptly maintains water clarity and circulation. If the pump fails to start‚ check the power supply‚ circuit breaker‚ and ensure the pump basket is clear of debris. A humming sound but no water flow often indicates a blockage in the impeller. Carefully inspect and remove any obstructions.
Reduced water flow can also signal a dirty filter. Regularly backwash sand filters or clean cartridge filters according to the manufacturer’s instructions. Cloudy water despite proper filtration suggests a filter issue or inadequate chemical balance.
Air locks in the pump can hinder performance; releasing trapped air through the priming plug usually resolves this. Unusual noises or vibrations warrant immediate investigation‚ potentially indicating worn bearings or a failing motor. If problems persist‚ consult a qualified pool technician for diagnosis and repair.
Maintaining your Coleman pool liner is crucial for longevity and preventing leaks. Regularly brush the liner to remove algae and debris‚ preventing staining and damage. Avoid harsh chemicals and abrasive cleaners‚ opting for mild pool-specific solutions. Sharp objects‚ including jewelry and toys‚ should be kept away from the liner to prevent punctures.
Small punctures can often be repaired with a vinyl liner patch kit‚ following the manufacturer’s instructions carefully. Ensure the area is clean and dry before applying the patch; Larger tears or significant damage may require professional repair or liner replacement.
Protect the liner from prolonged sun exposure when the pool isn’t in use‚ as UV rays can cause fading and brittleness. Proper water chemistry is also vital; imbalances can accelerate liner degradation. Inspect the liner regularly for signs of wear and tear‚ addressing issues promptly to avoid costly repairs.

Proper winterization protects your pool from freezing damage. This involves draining‚ cleaning‚ protecting the frame‚ and covering the pool for the off-season.
Before winterizing‚ completely drain the pool‚ utilizing the drain plug or a submersible pump. Ensure all water is removed from the liner‚ frame‚ and plumbing to prevent ice expansion damage. Thoroughly clean the pool liner with a soft brush and appropriate pool cleaning solution‚ removing any debris‚ algae‚ or stains.
Pay close attention to corners and crevices where dirt accumulates. Rinse the liner completely‚ ensuring no cleaning solution remains. Inspect the liner for any tears or punctures and address them with a repair kit. Clean the pool frame‚ removing any rust or corrosion with a wire brush and protective coating. Finally‚ clean all pool accessories‚ such as the ladder‚ pump‚ and filter‚ storing them in a dry location for the winter. A clean pool is crucial for a smooth spring reopening!
After draining and cleaning‚ focus on safeguarding the pool frame from winter’s harsh elements. Disassemble the frame components as much as possible‚ storing them indoors in a dry‚ protected area like a garage or shed. If complete disassembly isn’t feasible‚ thoroughly clean each metal part with a rust inhibitor to prevent corrosion.
Apply a protective coating‚ such as silicone spray‚ to all metal joints and connections. This will create a barrier against moisture and reduce the risk of rust formation. For above-ground pools‚ consider removing the top rails and storing them separately. Inspect all frame components for any signs of damage and replace any worn or broken parts before storage. Proper frame protection ensures longevity and simplifies setup next season.
A properly fitted winter cover is crucial for protecting your Coleman pool during the off-season; Ensure the cover completely encloses the pool‚ extending beyond the edges to prevent debris and water accumulation. Secure the cover tightly using a cable and winch system‚ or water bags placed around the perimeter‚ to withstand wind and snow loads.
Regularly check the cover throughout the winter‚ removing any accumulated leaves‚ snow‚ or standing water. A cover pump can be used to efficiently remove excess water. Avoid using dark-colored covers‚ as they can attract heat and promote algae growth. A well-maintained cover safeguards the pool water‚ prevents damage‚ and simplifies spring cleanup‚ ensuring a quicker return to swimming enjoyment.