Categories
Boiling a mouthguard is a popular method to customize its fit. Submerging it in hot water softens the material, allowing it to mold to your teeth for improved comfort and protection during sports.
A well-fitted mouthguard is essential for maximizing protection during sports and physical activities. Proper fit ensures the mouthguard stays in place, providing optimal cushioning and absorbing impact forces effectively. A poorly fitted mouthguard may shift during use, reducing its protective capabilities. Additionally, a proper fit enhances comfort, making it more likely to be worn consistently. The boil-and-bite method allows the mouthguard to mold to the unique shape of the user’s teeth and gums, creating a customized fit. This customization is crucial for athletes, as it helps prevent injuries to the teeth, gums, and jaw. A proper fit also minimizes issues like gum irritation or difficulty breathing, ensuring the mouthguard remains comfortable and functional during intense activities. By following the boiling instructions carefully, users can achieve a secure, tailored fit that enhances both safety and performance.

A pot, water, a stove or microwave, and a slotted spoon or tongs are essential. Optional items include a timer and a mug for soaking the mouthguard after boiling.
Gathering all necessary items before starting the process ensures a smooth and efficient experience. You will need a pot large enough to submerge the mouthguard completely in water, a stove or microwave to heat the water, and a slotted spoon or tongs to safely remove the mouthguard from the boiling water. A timer is also recommended to monitor the boiling time accurately. Additionally, a heat-resistant mug or container can be useful for soaking the mouthguard after boiling. Optional items include a thermometer to check the water temperature and a clean, flat surface for cooling the mouthguard. Ensure all items are within reach to avoid delays. It’s also a good idea to have a towel nearby to handle hot objects. Proper preparation of these items will help you achieve the best fit for your mouthguard.
Step-by-step preparation involves gathering a pot, water, stove, and timer. Fill the pot with enough water to submerge the mouthguard, place it on the stove, and begin heating. Prepare the mouthguard for submersion.

Gathering the necessary materials is the first step in preparing to boil your mouthguard. You will need a pot large enough to fully submerge the mouthguard in water, a stove or microwave to heat the water, and a spoon or tongs to handle the mouthguard once it’s hot. Additionally, a timer is essential to ensure the mouthguard is boiled for the recommended time, typically between 30 to 60 seconds. Some instructions also suggest having a mug or container ready to transfer the boiling water if you’re using a microwave. It’s important to have all these items within arm’s reach to make the process smooth and efficient. Proper preparation helps avoid accidents and ensures the mouthguard is molded correctly for a secure fit. Having everything ready beforehand also reduces the risk of burning the mouthguard or scalding yourself with hot water.
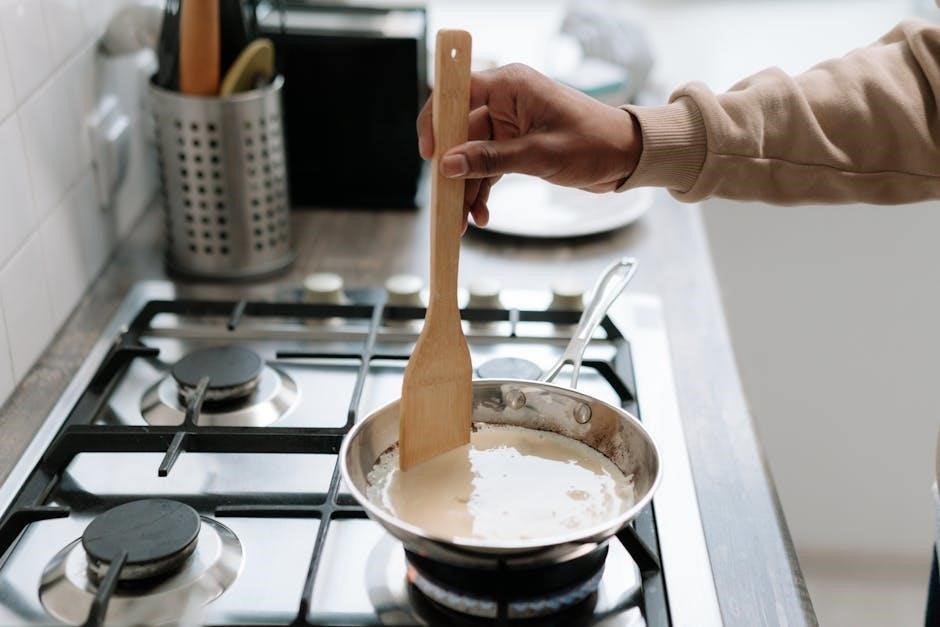
Heating water is a critical step in the mouthguard boiling process. Start by filling a pot with enough water to fully submerge the mouthguard; Place the pot on a stove and bring the water to a rolling boil. Alternatively, you can use a microwave to heat the water in a microwave-safe container. Ensure the water reaches a temperature of at least 170°F (76°C) but not exceeding the boiling point, as overly hot water may damage the mouthguard material. Avoid using water that is too cool, as it may not sufficiently soften the thermoplastic material. Once the water is hot, reduce the heat slightly to maintain a steady temperature. A thermometer can be useful to monitor the water’s temperature accurately. Properly heated water ensures the mouthguard softens evenly, making it easier to mold and fit securely around your teeth. Be cautious when handling hot water to prevent burns or accidents. Timing is crucial, so keep a timer nearby to track the heating process effectively.
Submerge the mouthguard in boiling water for 30-60 seconds to soften the thermoplastic material. Ensure it is fully covered for even softening. Use a slotted spoon to carefully remove it from the water.
Submerging the mouthguard in boiling water is crucial for softening the material. Fill a pot with enough water to cover the mouthguard completely. Bring the water to a rolling boil, typically around 200°F (93°C). Carefully place the mouthguard into the water using a slotted spoon or tongs to avoid splashing. Ensure it is fully submerged to allow even heating. Depending on the model, submerge the mouthguard for 30 to 60 seconds. Avoid exceeding the recommended time to prevent overheating, which can damage the material. Once the time is up, use the slotted spoon to carefully remove the mouthguard from the water. It should feel soft and pliable, ready for shaping. Be cautious as the mouthguard and water will be extremely hot. Proper submerging ensures the mouthguard molds correctly to your teeth for a secure fit.
The recommended boiling time for a mouthguard varies depending on the model and material. Most instructions suggest submerging the mouthguard in boiling water for 30 to 60 seconds. For standard thermoplastic mouthguards, 30 seconds is typically sufficient to soften the material. However, some models may require up to 90 seconds for optimal pliability. It’s crucial to follow the manufacturer’s guidelines to avoid overheating, which can damage the mouthguard. If you wear braces, the recommended boiling time is often shorter, around 10 seconds, to prevent the material from becoming too soft. After boiling, carefully remove the mouthguard with a slotted spoon and let it cool slightly before shaping. Overheating can make the mouthguard too soft, leading to a poor fit. Always test the mouthguard’s pliability with a utensil before placing it in your mouth to ensure it’s ready for shaping. Proper boiling time ensures the mouthguard molds correctly for a secure and comfortable fit.

After boiling, place the softened mouthguard in your mouth and bite down gently to shape it around your teeth. This ensures a proper fit and optimal comfort during use.
Once the mouthguard is soft, carefully place it in your mouth, ensuring it covers all upper teeth. Bite down firmly but gently to mold it around your teeth and gums. Use your fingers to press the edges against your mouth for a snug fit. Hold the bite for about 30 seconds to set the shape. This step ensures the mouthguard conforms to your dental structure, providing maximum protection and comfort. Proper shaping is crucial for effectiveness in absorbing impacts during sports activities. If the fit isn’t right, you can re-boil and adjust as needed. Always follow the manufacturer’s guidelines for optimal results.
After shaping, let the mouthguard cool slightly to set its form. Avoid moving it during this time to prevent distortion. This step ensures the mouthguard retains its shape for optimal protection and fit.
After fitting, rinse the mouthguard with cool water to remove any bacteria. Clean it regularly with mild soap and water to maintain hygiene. Store it in a protective case to prevent deformation. Avoid exposing it to extreme temperatures or harsh chemicals. Regularly inspect for wear and tear, and replace it if damaged. Proper care ensures longevity and optimal protection during use.

Rinse the mouthguard with cool water after use. Clean it with mild soap and water, then dry thoroughly. Store it in a protective case to maintain shape and hygiene.
Regularly inspect your mouthguard for signs of wear or damage. Avoid using harsh chemicals, as they can degrade the material. Store it in a dry, protective case when not in use to prevent deformation or contamination. For optimal longevity, ensure the mouthguard is completely dry before storing. Replace it if it shows significant wear or if it no longer fits securely. Cleaning with mild soap and water after each use helps maintain hygiene. Additionally, avoid chewing on the mouthguard when it’s not in use, as this can cause unnecessary stress on the material. By following these maintenance tips, you can extend the life of your mouthguard and ensure it continues to provide adequate protection during sports activities. Proper care will also help maintain its comfort and effectiveness over time.